Spring is a wonderful time to pamper your indoor plants. Many of them will just be coming out of their winter dormancy, ready to begin waking up and growing new leaves. However, it’s important to know how to look after them each spring to ensure that they stay healthy and growing for years to come.
Before you begin setting up your dream plant arrangement for the spring, learn about what indoor plants need each spring and how you can provide the best possible season for them.
For more information on looking after specific indoor plants, check out our indoor plant guides.


Step 1 – Spring watering tips
As your plants begin to show signs of waking up you will need to find the proper balance of water to ensure they wake up happy and healthy. If you don’t increase their water intake enough, your plants will become dehydrated. On the other hand, increase their water too much or too frequently and your plants could experience root rot. You will want to gradually increase their water intake over several weeks, continuously checking the soil’s moisture levels to determine if your plants need more water or not.
Most plants prefer watering when the top of the soil feels dry. Check it by pressing your finger a few centimetres (to the second knuckle) deep. Your plant will most likely need watering if the potting mix is dry or doesn’t stick to your fingertip. Wait to water succulents until most of the soil is dry. Water-loving plants, like philodendrons and spider plants, prefer wetter soil.
If the potting mix is extremely dry or it runs quickly through the pot and out through the holes, then it could be repelling water. Applying a soil wetter such as Seasol Super Soil Wetter & Conditioner will help to overcome this, getting water to the plant’s root system.
Step 2 – Spring light requirements
Proper lighting is crucial when it is time for your plants to wake up from their dormancy. As the days grow longer, and the temperature begins to rise you can help your plants wake up by moving them ensuring they get optimal light. Based on the plants themselves, several different light sources might suit them best. Here are some tips on placement based on your specific plant type.
- Direct Sunlight: This type of sunlight most often comes from the north or east where the sun is strongest during the afternoon and evening. When plants are positioned in windows facing these directions they will get hours of strong, unfiltered light as long as there are no curtains, large trees, or buildings blocking the sun from shining through.
- Indirect Sunlight: While still bright, indirect sunlight will be more filtered than direct sunlight. Indirect sunlight can be found from any window no matter what direction it is facing and can be utilised up to several metres from the window itself.
- Low Sunlight: Most often found with south-facing, high-up, or partially blocked windows, this light is best used for plants that can adapt well to less-than-ideal conditions. No plants love low light, you can still show off your green thumb in these conditions with the right plants.
- Grow lights: When direct and indirect sunlight are not options, specific bulbs or LEDs called grow lights can help you get all of your plants the proper light they need. Whether you simply do not have great windows or have so many plants you’ve run out of window real estate, choosing grow lights is an easy solution to provide all of your plants with optimal lighting.
Plants are unique in their needs. While one plant will thrive with minimal light, others will struggle to grow. It is important to pay attention to your plants for signs they might need more direct sunlight. Long skinny stems, larger spacing between leaves, smaller leaves, leaning toward the light, abnormal leaf colorings such as pale green or yellow, slowed growth, and no new growth are all signs your plants need more light.
Just as some plants will need more light than you are providing, the opposite can be true as well. Too much light and heat can cause the chlorophyll in your plants to break down so it is important to pay attention to changes in your plant’s leaves such as bleached, faded, or pale areas or if they become yellow, brown, burnt, or brittle. Luckily moving your plants to more indirect light is all that is needed to remedy this issue.
Check individual plant tags for specific light requirements or check out our individual indoor plant guide.


Step 3 & 4 – Spring temperature and humidity control
If your thermostat is set to different temperatures based on the weather outside, be sure to turn the temperature up a few degrees as spring begins to alert your plants to the changing season. Unless they are close to a window or door, they may not notice temperature changes outside, so your indoor temperature and lighting changes are their only signs of the changing season.
You may also want to consider adjusting your humidity levels in the house. Often, the air is dryer in the winter, so you may have used a humidifier or water spray bottles to increase the humidity in your home, especially around your plants. As the spring and summer seasons arrive, the air’s natural humidity increases, but your air conditioner may also dehumidify the air once it’s turned on. It’s important to keep track of the humidity in your home so you can adjust it accordingly.
In addition to monitoring your temperatures and humidity levels, there are a few related key points to keep in mind. When caring for indoor plants, be sure to:
- Check Plant-Specific Needs: Before organising your plants or designating grow area settings, keep in mind that different types may need specific temperature ranges and humidity levels. Research each plant that you have so that you’re aware of their environmental needs. It’ll definitely help you provide the best possible care for each of your indoor plants.
- Change Temperatures Gradually: Sudden changes in temperature can stress your plants out, which leads to leaf loss or stunted growth. To avoid this, you’ll need to very gradually adjust your temperature settings.
- Monitor Soil Moisture: When temperatures and humidity levels fluctuate, your plants’ watering needs may change. Keep an eye on your soil’s moisture levels to determine how current temperatures affect it. This way, you can avoid over or under-watering.
- Keep Growing Areas Well-Ventilated: Warm, highly-humid areas can lead to mould and fungal growth. To prevent this and keep your plants at the right humidity level, use fans or crack open a window to keep air circulating around your indoor plants.
- Create Temperature and Humidity-Based Groups: Some plants call for different temperatures and humidity levels than others. If you have a plethora of plants, try grouping them based on their unique needs. For example, group plants that need less heat and sunlight farther away from windows and plants that need high humidity closer to the humidifier.
Indoor plants can come with an array of care demands, but by keeping track of their needs, you’ll be able to create an ideal environment for them. The right temperature and humidity levels can have a significant impact on the growth and vitality of all the plants in your home.
Check individual plant tags for specific temperature and humidity requirements or check out our individual indoor plant guide.


Step 5 – Spring repotting and potting tips
Repotting is an essential part of plant care, especially for those that have experienced significant growth. Here are some expert tips to ensure your plants continue to thrive in their new homes.
- Choose the Right Time: The best time to repot your plants is during their active growing season. This allows the plant to quickly establish itself in the new pot. While autumn and spring are often popular times for repotting, be sure to avoid doing so during extreme temperatures to prevent adding stress to the plant.
- Select an Appropriate Pot: Choose a pot that’s slightly larger than the current one. A pot that’s too large can lead to overwatering, which may result in waterlogging and root rot. You should also make sure the new pot has adequate drainage holes to prevent excess water accumulation.
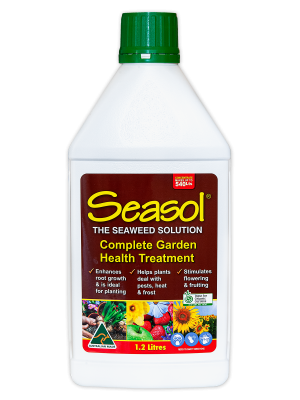
- Prepare the Plant: Before repotting, water your plant with Seasol a day or two beforehand to help the plant cope with transplant shock. This also makes it easier to remove the plant from its current pot without damaging the roots. Gently loosen roots if they are compacted or circling around the pot.
- Use Premium Potting Mix: Invest in a high-quality potting mix such as Seasol Indoor Potting Mix suitable for your specific plant type. We recommend using a mix that retains moisture while providing good drainage to support healthy root development.
- Position the Plant Correctly: You should place the plant in the new pot at the same depth it was in the old pot. Then, fill around the roots with the potting mix, making sure there are no air pockets. Firmly but gently press the soil to secure the plant.
- Water and Nourish: After repotting, water the plant with Seasol to help it settle in. This also ensures the roots will remain hydrated and aids in nutrient absorption. This is especially important for indoor succulent plant care, as succulents depend on water throughout the soil to maintain a strong root system.
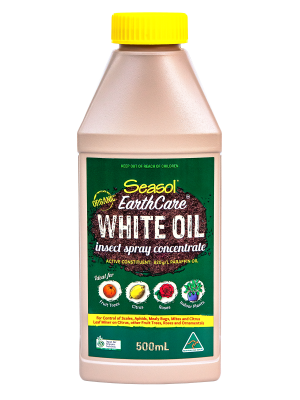
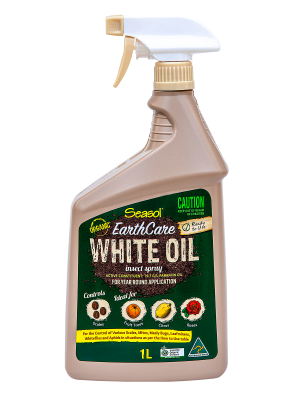
- Monitor and Adjust Care: Keep an eye on your repotted plant, especially during the first few weeks. Adjust watering schedules as needed, and apply Seasol weekly to ensure healthy growth and a strong root system. Also, ensure the plant is receiving adequate light. You should also regularly check for signs of stress or pests and address any issues promptly such as applying EarthCare White Oil insect spray to control pests and add a nice leaf shine.
Step 6 – Feeding indoor plants in spring
Your plants are hungry when they first come out of dormancy! A crucial part of plant care is providing the right nutrients through plant food and fertilisers. Different houseplants have varying nutritional needs. Some require more frequent feeding, while others thrive with minimal intervention. Before you start feeding your plants, research the specific requirements of each type of plant by checking the plant tag, speaking to horticultural staff when purchasing the plant or checking our individual indoor plant guides.
A liquid or granular fertiliser can be used on all indoor plants. Check specific plant tags for more detailed information. Apply granular PowerFeed Controlled Release Pots & Plants for Indoor & Outdoors once every season. It combines a premium mix of nutrients, seaweed, and microbes for all plants in pots. Supplement or apply a liquid fertiliser such as PowerFeed PRO SERIES Pots & Planters or PowerFeed All Purpose including Natives every 2 to 4 weeks from spring to autumn and less often in winter.
For a ready-to-use no-mixing formula, apply PowerFeed Indoor & Potted Plants 1.25 Lt trigger spray to the soil. This easy-to-use liquid fertiliser and soil conditioner helps to improve your soil and feed your plants. Apply every 2 to 4 weeks during the growing season.


Step 7 – Spring maintenance and pruning
While it may seem counterintuitive to prune your plants to see new growth, it’s actually one of the most important steps you can take! Here are some of the main spring maintenance and pruning tasks you should do each year.
Clean Plant Leaves
While some plants, such as snake plants, may require more frequent cleaning, it’s a great idea to gently wipe off plant leaves each spring to remove any winter dust that may have settled on them. Here’s how to clean your plant’s leaves quickly and safely.
- Use a damp cloth to gently wipe each leaf. The cloth should be damp enough to pick up dust and debris, but not so damp that it leaves water droplets on the leaves. Microfiber rags are great options to achieve this.
- Check for excess debris to make sure your damp cloth picked up everything. Some leaves may need more attention than others, so it’s a good idea to check after each pass. If your cloth starts to pick up less dust as you go, you may need to clean it off before continuing.
- Wipe with a dry cloth to ensure there aren’t any water droplets left on the leaves. Excess moisture on leaves could lead to pests or rotting, which may require further treatment or reduce your plant’s growth potential this season.
Cleaning indoor plant leaves with this method removes dust and can help ensure your plant is getting as many nutrients as possible from the sunlight and air around it. Once clean apply EarthCare White Oil insect spray to the foliage to help control pests and add a nice leaf shine.
Pruning
Pruning is an important part of plant maintenance to ensure your plants grow the way you prefer and aren’t spending precious energy on leaves that are already dying. To prune effectively, make sure you have a pair of secateurs and a small container to collect pruned leaves for composting later.
Carefully review each plant and see if there are any leaves that are yellowing or browning. These leaves will not be able to support your plant’s growth as well as fresh, new green leaves. You may simply trim a browning spot off if the leaf is otherwise healthy or remove the entire leaf if most or all of it shows signs of decay. Try to trim each leaf off at a node if possible to encourage new growth in place of the leaves you are removing.
If you suspect disease on any of the leaves you are pruning, it’s important to clean your secateurs between snips to avoid contaminating other leaves or plants. Usually, a quick wipe with some rubbing alcohol and a rag will do the trick.
Avoid removing more than a quarter of each plant’s leaves whenever possible to ensure your plant still has enough support to continue growing new leaves. You may need to prune in stages a few weeks apart to manage this, so set reminders to avoid going too long between pruning sessions.
Tidy the Soil
This is also a great opportunity to tidy the soil your plant is growing in. First, remove any debris or dead leaves that may have fallen into the soil during the previous season. This is an important step to avoid root rot, as items covering the soil surface may reduce water evaporation over time.
Then, you may want to see if the soil is still at an ideal level on the plant, as soil may compress over time. Add more potting mix soil such as Seasol Indoor Potting Mix as needed to make sure your plant still has plenty of room to grow root systems.
If the existing potting mix is still looking good and doesn’t need replacing apply Seasol Potting Mix Booster into the top layer of the potting mix and water it in thoroughly to help extend the life of the mix. It adds beneficial microbes to revitalise potting mix which helps to improve moisture and nutrient retention and assist the plant’s root system.


Watch out for….
Keeping pests and diseases at bay in spring is essential for maintaining a healthy and thriving indoor plant garden. It’s unpleasant to imagine insects and fungus feeding on your houseplants. Unfortunately, many indoor plants deal with pests eventually. Keep watch for these invaders during the spring.
- Mealybugs: They look like fluffy balls. They collect on the bottom of leaves and plant stems and feed on sap, draining the plant’s nutrients. You can treat a light infestation by running a steady stream of water over the leaves and stems. If the infestation takes hold use EarthCare White Oil insect spray – see details below.
- Aphids: They also feed on plant sap. They reproduce quickly and can hang on tightly to a plant. You may remove the mature insects by rinsing your plant in water or remove them by hand (wear gloves). Or if the infestation takes hold use EarthCare White Oil insect spray – see details below.
- Spider Mites: These tiny pests like to feed on plants with soft leaves. They leave behind a telltale webbing. Spider mites cannot thrive in moisture, so treat your plant by watering it and spraying the leaves frequently.
- Scale: These insects are small and flat with a protective waxy coating. If the infestation is small, remove them by hand (wear gloves) or if the infestation takes hold use EarthCare White Oil insect spray – see details below.
- Whiteflies: Like most plant pests, whiteflies are tiny. You may see them fly up in large numbers when disturbed. You can use sticky traps to catch the mature flies and spray your plant with EarthCare White Oil insect spray – see details below.
- Root Rot: The fungus that causes root rot lives in the soil all the time. However, it comes out of dormancy when a plant gets too much water (which may happen when you increase watering in the summer). You may need to discard the diseased part of the plant and start fresh with healthy cuttings.
- Powdery Mildew: High humidity and increased temperature can encourage powdery mildew to grow. It can weaken your plant but is rarely fatal. Remove infected leaves and move your plant away from direct sunlight. Decrease the humidity if possible.
TIP: Apply EarthCare White Oil insect spray to both sides of the foliage. Do not spray when beneficial insects are around or in the heat of the day as it may burn the foliage. Repeat applications may be necessary.